Ceiling fans are the unsung heroes of home comfort, not only allowing air to circulate but also adding a touch of style.
Maybe you'll go through this process: When a ceiling fan lights burns out, replacing it can be a headache. From removing the shade, to finding the right bulb, to making sure it's installed correctly, it all sounds a lot more complicated than it is.
Don't worry! This guide will show you by hand how to replace a ceiling fan bulb with ease - no stress, no confusion. Whether you're replacing it for the first time or just need to recall the steps, you can follow this guide with ease.

Preparing for the Light Bulb Replacement
Replacing a light bulb in a ceiling fan requires careful preparation to ensure safety and compatibility. Understanding the wiring, socket, and fixture is crucial to avoid electrical hazards. This guide covers power-off procedures, tools needed, ceiling fan identification, and selecting the right bulb for efficiency and longevity.
Safety First: How to Safely Power Off the Ceiling Fan
- Turn off the wall switch controlling the ceiling fan and light.
- Locate the circuit breaker in your electrical panel and switch off the power to the fan.
- Remove the fuse or trip the breaker if necessary to ensure a complete power cutoff.
- Use a multimeter to verify that no electricity is flowing to the fixture.
- Wear insulated gloves and safety goggles to protect against accidental sparks or debris.
⚠️ Never attempt to change a light bulb while the fan is moving or the power is still connected.
Gathering the Right Tools for Ceiling Fan Bulb Replacement
A successful light bulb replacement in a ceiling fan fixture requires the right tools to ensure smooth installation.
| Tool | Purpose | Safety Tips |
|---|---|---|
| Ladder | Helps you reach the ceiling fan | Use a sturdy, non-slip ladder on a level surface |
| Screwdriver | Removes the light fixture housing | Use a Phillips or flat-head screwdriver based on the fixture type |
| Pliers | Helps in loosening tight screws or connectors | Use rubber-grip pliers for better handling |
| Gloves | Protects hands from glass and heat | Use heat-resistant gloves if replacing a recently used bulb |
| Multimeter | Checks for electrical current in the socket | Always test before touching any wires |
Using these tools properly will prevent injuries, fixture damage, or electrical hazards while changing the bulb.
Identifying the Ceiling Fan Model and Light Bulb Type
1️⃣ Check the brand and model number – This is usually on a label near the fan’s motor or inside the housing.
2️⃣ Determine the bulb base size – Some ceiling fans require a specific socket type, such as E26 for standard bulbs or E12 for smaller candelabra bulbs.
3️⃣ Review wattage limits – The fixture might have a maximum wattage rating to prevent overheating.
4️⃣ Confirm compatibility with your fan's switch – Some ceiling fans with remotes require dimmable bulbs, while others only work with specific wattages.
5️⃣ Check if a special housing is needed – Some ceiling fan lights have enclosed casings that limit the size or shape of the bulb.
💡 Understanding these details ensures you purchase the right replacement bulb, preventing flickering, overheating, or improper fit.
Choosing the Best Light Bulb for Your Ceiling Fan
A well-chosen light bulb enhances the brightness, efficiency, and durability of a ceiling fan fixture.
- LED Bulbs – Long lifespan, low energy use, minimal heat output.
- CFL Bulbs – Energy-efficient but slower to reach full brightness.
- Incandescent Bulbs – Traditional, warm lighting but short lifespan.
- Halogen Bulbs – Bright and dimmable, but generate more heat.
✅ Opt for LED bulbs for energy savings and longevity, ensuring compatibility with your ceiling fan’s wiring and switch settings.
Before replacing a ceiling fan light bulb, ensure power is off, tools are ready, the fan model is identified, and the correct bulb is chosen. This preparation prevents electrical hazards, fixture damage, and incorrect installations, leading to a safer, efficient ceiling fan lighting upgrade.

Removing and Replacing the Light Bulb
Replacing a light bulb in a ceiling fan requires precision and the right tools. Ensuring the proper removal of the light fixture components, inspecting the socket and wiring, and securely installing the new bulb will help maintain optimal ceiling fan lighting performance.
How to Remove a Ceiling Fan Light Cover or Housing
Removing the light cover or housing varies depending on the ceiling fan model. Follow these steps to detach it safely:
-
Turn Off the Power: Ensure the power is switched off at the circuit breaker to prevent electrical hazards.
-
Use a Ladder for Stability: Position a ladder under the ceiling fan and wear gloves for grip and protection.
-
Locate the Retention Mechanism: Identify if the light cover is held by screws, clips, or a twist-lock mechanism.
-
Unscrew or Unlock the Housing:
- If screws are present, use a screwdriver to loosen them.
- If it has a twist-lock, rotate the cover counterclockwise until it detaches.
- Some covers use clips; gently press them to release the cover.
-
Lower the Housing Carefully: Hold the light fixture housing securely while removing it to avoid damaging the socket or wiring.

How to Safely Remove a Burnt-Out Light Bulb
Follow these safety precautions to prevent injuries or damage while removing a burnt-out LED, incandescent, CFL, or halogen light bulb:
-
Wait for the Bulb to Cool Down: Incandescent and halogen bulbs retain heat, increasing burn risks.
-
Use Gloves for Grip: Bulbs may be fragile or slippery; gloves help prevent breakage.
-
Turn the Bulb Counterclockwise: Slowly unscrew the bulb to avoid damaging the socket or base.
-
Inspect the Bulb: If the bulb is broken, use pliers to remove any remaining fragments.
-
Check for Loose Wiring: Inspect the socket and wiring for corrosion or burn marks.


Inspecting the Socket and Wiring for Issues
A faulty socket or damaged wiring can prevent the new light bulb from working. Conduct a thorough check using the table below:
Common Socket and Wiring Issues & Fixes
| Issue | Possible Cause | Recommended Solution |
|---|---|---|
| Loose socket connection | Socket not secured to the base | Tighten the socket screws |
| Burn marks on socket | Overheated bulb or short circuit | Replace the socket |
| Frayed wiring | Aging or excessive bending | Rewire the connection |
| Corroded socket contacts | Moisture exposure | Clean with electrical cleaner |
| Bulb flickering | Loose wiring or faulty switch | Inspect and tighten wires |
After performing these checks, ensure the socket and housing are in good condition before installing a new bulb.
How to Install a New Light Bulb in a Ceiling Fan
Installing a light bulb properly ensures longevity and performance. Follow these steps:
Step 1: Choose a compatible LED, incandescent, CFL, or halogen bulb. Check the ceiling fan’s recommended wattage.
Step 2: Align the bulb base with the socket and insert it carefully.
Step 3: Rotate the bulb clockwise until snug. Avoid over-tightening to prevent damage.
Step 4: Restore power and test the bulb before reassembling the housing.

Reassembling the Ceiling Fan Light Fixture
Once the new bulb is installed, reassemble the light fixture housing using the appropriate method:
- Screw-fastened covers: Align and tighten screws securely.
- Twist-lock designs: Rotate the housing clockwise until it locks.
- Clip-on housings: Snap the clips into place carefully.
Check that the housing, socket, and bulb are secure before turning on the ceiling fan light. Proper reassembly ensures long-term stability and safety.
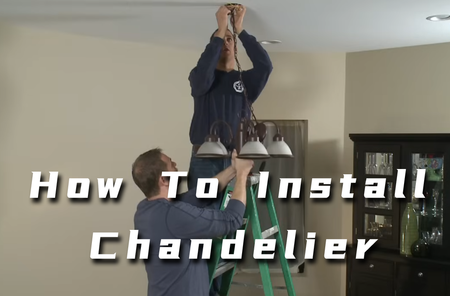
"Maybe you can also see how a professional repairman replaces a ceiling fan bulb"
Troubleshooting and Ensuring Proper Functionality
Replacing a light bulb in a ceiling fan should be a straightforward process, but sometimes, issues arise. From flickering lights to complete failure, troubleshooting ensures that your ceiling fan lighting works as expected.
Why Your Ceiling Fan Light Won’t Turn On After Replacing the Bulb
Sometimes, after installing a new light bulb, the ceiling fan light still won’t illuminate. Several factors could be responsible:
- Loose Light Bulb: If the bulb base is not securely screwed into the socket, it may not make proper contact.
- Power Supply Issues: Check if the circuit breaker has tripped or if there’s a blown fuse.
- Faulty Wiring: Over time, wiring inside the light fixture or fan housing may become loose or disconnected.
- Incompatible Bulb Type: Not all LED or CFL bulbs are compatible with ceiling fan light fixtures, particularly those with dimmer switches.
- Defective Socket or Switch: A worn-out socket or wall switch could prevent power from reaching the bulb.
If your new bulb isn’t working, start by systematically eliminating these potential causes.
Common Ceiling Fan Light Problems and How to Fix Them
Problem-solving for ceiling fan lights involves a step-by-step approach:
-
Flickering Bulbs
- Cause: Loose connection in the socket or issues with the switch.
- Fix: Ensure the light bulb is tightly screwed in and check the wiring in the fixture.
-
Dim or Weak Light Output
- Cause: Low wattage bulb, incompatible dimmer switch, or dust buildup.
- Fix: Upgrade to a higher-lumen LED or incandescent bulb and clean the light cover.
-
Light Turns On and Off Randomly
- Cause: Loose fan blades vibrating the bulb, or faulty remote control interference.
- Fix: Secure the fan blades, replace remote batteries, or reset the ceiling fan switch.
-
Overheating Light Fixture
- Cause: Using a halogen or high-wattage bulb in a fixture designed for lower power.
- Fix: Switch to an energy-efficient LED bulb and check the housing for ventilation.
Testing and Verifying the New Bulb’s Functionality
To confirm whether the newly installed light bulb is working correctly, follow these steps:
- Check the Power Source – Ensure that the circuit breaker is switched on and that there are no blown fuses in the electrical panel. If necessary, reset the breaker to restore power to the ceiling fan fixture.
- Inspect the Wiring – Turn off the power and carefully remove the light fixture housing. Look for any loose or damaged wiring inside the socket or connections leading to the bulb base. Use pliers to secure any loose wires.
- Try a Different Bulb – Sometimes, the issue is with the light bulb itself. Replace the current LED or CFL bulb with another working bulb of the correct wattage and type to see if the problem persists.
- Test the Switch and Remote – Toggle the wall switch and try different settings on the fan remote control to verify if the issue is with the switch rather than the light fixture. If the fan operates but the bulb does not, the problem likely lies in the light assembly.
- Reset the Circuit – If none of the above steps resolve the issue, turn off the power, wait a few minutes, and switch it back on. This resets any potential power interruptions affecting the ceiling fan light.
By following these troubleshooting steps, you can determine whether the issue is with the bulb, the socket, the wiring, or the power supply, ensuring proper functionality after installation.

Conclusion
Changing a light bulb in a ceiling fan might seem like a simple task, but as we’ve explored, it requires the right tools, careful safety measures, and a good understanding of light fixture components. By following this structured guide, homeowners can confidently perform a bulb replacement while avoiding common pitfalls such as incorrect bulb selection, electrical risks, or improper installation.
By prioritizing safety, functionality, and longevity, you ensure that your ceiling fan lighting system remains reliable and efficient. If any issues arise, refer back to the troubleshooting and maintenance sections for guidance. Now, with your ceiling fan light fixture shining bright, you can enjoy a well-lit and comfortable space.