Swapping out a ceiling light fixture might sound like a big job, but trust me—it’s not rocket science. How to Change Out a Ceiling Light Fixture? is something even weekend warriors can tackle with a little know-how and the right tools. Maybe your old light’s flickering like a haunted house, or you just want a glow-up for the room—either way, you’re in the right place.
Think of this guide as your step-by-step game plan: we’ll go over what to buy, what to check before you climb that ladder, and how to get the job done safely. “Electricity isn’t scary—it just demands respect,” as one seasoned electrician put it.
This isn’t just about looks—it’s about function, fit, and not frying your wiring. Let’s break it down so you don’t break a sweat.
What Is a Ceiling Light Fixture?
“Customers ask me all the time, what exactly is a ceiling light fixture?” said Martha Lane, a senior lighting consultant at Illumina Studio, known for her decades of experience in high-end interior lighting. “And you know what? It is more than just a light. It is part utility, part style statement.”

A ceiling light fixture is a lighting fixture mounted directly to the ceiling, designed to distribute light across a room. These fixtures vary from the ultra-minimalist flush mount models to lavish chandeliers suspended like jewelry from above. The function is obvious: to illuminate. The form? That is where things get interesting.
🎯 Common types of ceiling light fixtures:
- Flush mount: Sits close to the ceiling, ideal for low ceilings
- Semi-flush mount: Hangs slightly lower, allowing for more style
- Chandelier: Decorative and dramatic, often used in foyers or dining areas
- Pendant light: Single drop-down fixture, modern and focused
During a product launch event in New York, designer Evelyn Cruz shared her design philosophy. “Every fixture has its mood. The right ceiling light transforms not only a room but how you feel in it.”
📌 Consumer Insight: According to a 2024 survey by HomeLight Solutions, 71% of homeowners said replacing a ceiling light fixture made their room “feel brand new.” That emotional impact cannot be underestimated.
🛠️ From practical lighting to aesthetic centerpiece, a ceiling light plays many roles. It is not just about brightness—it is about atmosphere, safety, and even resale value. Anyone who has replaced a dated light fixture with a sleek LED knows: the right fixture changes everything.
Essential Tools for Replacing Ceiling Lights
Before you even touch a wire, the right tools can make or break your ceiling light replacement. Let’s get your toolkit sorted and your safety gear ready.
Basic hand tools for ceiling lights
You don't need a contractor’s van full of gear — just a few trusty essentials will do. Here’s the usual lineup:
- Screwdrivers (flathead and Phillips) to detach brackets and loosen fixtures
- Pliers and wire strippers for dealing with old or brittle wiring
- Fish tape helps run wires through tight spaces
- Electrical tape and a voltage tester (a must!)
- And don’t forget your ladder, flashlight, and utility knife for access and visibility
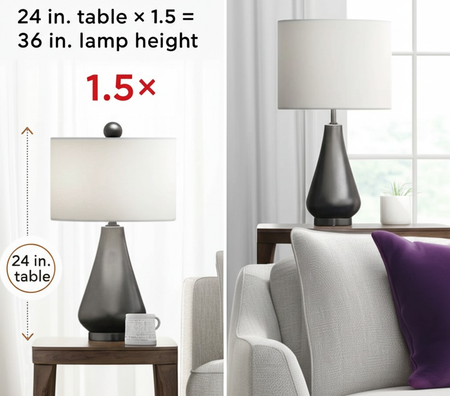
Pro tip: keep a measuring tape on hand for checking fixture and ceiling box alignment.

Safety gear for light fixture work
- Put on safety glasses — nothing ruins a Saturday like falling dust or fiberglass to the eye.
- Slip on gloves (non-slip, insulated if possible) to protect your hands from sharp wires or hot parts.
- Use a dust mask and earplugs if you're working in a noisy or crumbly ceiling area.
- Non-conductive shoes + long sleeves = less shock risk.
- Got a fire extinguisher nearby? Good. A hard hat may seem overkill, but it’s smart if working beneath beams.
⚠️ Electricity and ladders are not forgiving — dress the part!

Voltage testers and wire connectors
Let’s be honest — if you don’t test the wires first, you’re gambling with your eyebrows. Here’s what you’ll need:
- A non-contact voltage tester is your best friend for zero-touch safety checks
- A multimeter gives voltage readings if you’re feeling technical
- Use wire nuts, butt connectors, or crimp connectors to secure new wiring connections safely
- Seal with electrical tape and double-check with your wire strippers that insulation is correct
“I always tell folks: your tools don’t need to be expensive — they just need to be reliable.” — Eddie Carter, licensed electrician & safety trainer
How to Remove an Old Ceiling Light?
Swapping out an old ceiling light? Let’s break it down step-by-step to keep things safe, simple, and smart.
Step 1 - Turn off power and test wires
First things first — cut the power. Head to the circuit breaker and flip the switch connected to the ceiling fixture. Then grab a voltage tester to confirm the electrical wires are dead before touching anything. Use safety precautions like wire nuts or electrical tape to secure exposed ends if needed. Don’t skip this — getting zapped isn’t on the project list.


Step 2 - Remove light bulbs and cover
Put on protective gloves to avoid cuts or cracked glass.
- Unscrew the light bulbs and carefully set them aside.
- If your fixture has a shade cover, remove the finial or other fasteners like a lamp harp.
- Gently lower the glass shade or fabric shade — don’t force it.
This step lets you reach the inner parts of the fixture without breaking anything.


Step 3 - Detach mounting screws and bracket
You’ll need a screwdriver here. Use it to:
- Remove any decorative nuts or finials holding the fixture in place.
- Unscrew the mounting screws from the ceiling electrical box.
- Detach the bracket or lamp base, and watch out — the fixture might start dangling.
Hold it steady while loosening. This part can get a little awkward, especially with older, heavy fixtures.


Step 4 - Disconnect wiring and label cables
Before unplugging wires, snap a pic or sketch a quick wiring diagram.
- Twist off the wire connectors and gently pull apart the wires.
- Use labels or cable ties to tag each wire: black (hot), white (neutral), green/bare (ground).
- Wrap disconnected ends with electrical tape if you're pausing the job.

| Wire Type | Color | Function |
|---|---|---|
| Hot | Black | Power supply |
| Neutral | White | Return current |
| Ground | Green | Safety path |
This makes installing your new ceiling light a breeze later — no head-scratching.
Ceiling Light Compatibility Guide
Ceiling light fixtures are not one-size-fits-all. Every luminaire must match the home’s structure, wiring, and purpose. Getting this wrong does not just affect performance — it risks safety, energy waste, and unnecessary cost. Ceiling type, fixture weight, and electrical system limits are not optional details. They are the foundation of a reliable installation.
A common issue people face is choosing a fixture based purely on looks. Take, for instance, a CFL bulb ceiling light intended for a sloped ceiling. Without a compatible mounting style, the light will never sit flush or function correctly. The wrong electrical box might not hold the fixture weight, especially for those using halogen bulbs or large traditional incandescent bulb fixtures.

🔎 Key compatibility factors include:
- Fixture type and ceiling type must align. Flush mounts require flat ceilings, while sloped ceilings need adjustable brackets.
- Electrical box strength must support the total fixture weight. Most modern LED bulb setups are lighter, but older units with transformers or ballasts can be much heavier.
- Dimmer switch compatibility is often overlooked. A dimmer designed for incandescent bulbs will likely cause LED bulbs to flicker or buzz.
- Wiring setup should support the needed voltage. Some fixtures, particularly those with built-in transformers, are sensitive to power inconsistencies.
Installing a Ceiling Light Fixture
Getting that new ceiling light up and running safely and stylishly.
Securing the Mounting Bracket
Start by turning off power at the breaker. The mounting bracket holds the fixture steady, so secure it like a pro:
- Use screws to attach it to the electrical box or junction box
- Align with fixture mounting holes
- Tighten with a screwdriver
- Hook up the safety cable if included
- Connect the ground wire to the green screw

Pro tip: Always double-check that your mounting hardware is compatible with the weight of your fixture. Wobbly lights? That’s a big no.
Wiring the New Fixture Safely
Let’s get wired—safely.
- Flip off the circuit breaker and confirm with a voltage tester.
- Use wire strippers to prep the black, white, and ground wires.
- Twist wires together with wire nuts and secure them with wire connectors.
- Wrap all connections with electrical tape for extra safety.
⚠️ Always follow your local electrical code. If things feel too advanced, don’t hesitate to call in a licensed electrician.

“In residential work, precision in wire matching is non-negotiable. It’s not just safety—it’s the law.” — Carlos Mendez, Master Electrician & NEC Contributor
Testing and Adjusting Light Installation
Okay, moment of truth: time to test and tweak.
- Screw in the light bulb
- Flip the light switch and check brightness
- Use a dimmer switch if compatible
- Adjust light direction or fixture alignment
- Make sure the lamp shade and decorative elements are sitting straight
A crooked install messes with your room’s overall appearance. You’ve come this far—take a moment to make it perfect.
LED vs. Traditional Ceiling Lights Fixture: Which to Choose?
Choosing between LED and traditional ceiling lights? This guide breaks it down — performance, cost, and light quality — so you can make the best call for your space.
Energy Efficiency Comparison
LEDs seriously outshine the rest. They deliver more lumens per watt and waste less energy as heat. Here's a look:
| Light Type | Lumens/Watt | Avg. Lifespan (hrs) |
|---|---|---|
| Incandescent Bulbs | 10–30 | 3,000 |
| CFLs | 35–60 | 8,000 |
| LEDs | 100–300+ | 25,000–50,000 |
With Energy Star ratings, LEDs reduce energy consumption and environmental impact, all while offering major cost savings over time.

Cost and Lifespan Differences
Let’s keep it real — LED fixtures cost more upfront, but they're total champs over time.
- Purchase Price: LEDs might sting at checkout, but...
- Replacement Costs: They last years longer — say goodbye to climbing ladders every few months!
- Long-term Costs: LEDs win by a mile. Their lifespan and durability reduce maintenance and replacements.
💡 “A quality LED can last over 20 years,” says Diana Feng, product analyst at LightTech Global. “It’s an investment with guaranteed returns.”
Light Quality and Dimming Options
Not all light is created equal — and not all bulbs dim the same way, either.
- LEDs now boast high CRI scores, so colors pop more naturally.
- Color Temperature ranges let you set the mood — from warm white to daylight vibes.
- Dimmability? LEDs are game, but check for dimmer compatibility to avoid flickering or eye strain.
- Traditional incandescents dim smoothly but burn out fast. CFLs? Meh — limited dimming, harsh glare.
Bottom line: If you’re into cozy, eye-friendly lighting with modern control, LEDs take the win.
Conclusion
Swapping out a ceiling light might feel like wrestling with a spiderweb of wires, but once you’ve done it, it’s kind of like fixing your own bike for the first time—you won’t want to stop there.
Grab the right tools, cut the power, follow the steps, and you’re golden. It's all about safety, patience, and keeping calm when things don’t go perfectly.
Ready for your next home upgrade? Let that fresh light fixture spark some bigger ideas.